This article was originally published on RealLifeDIY
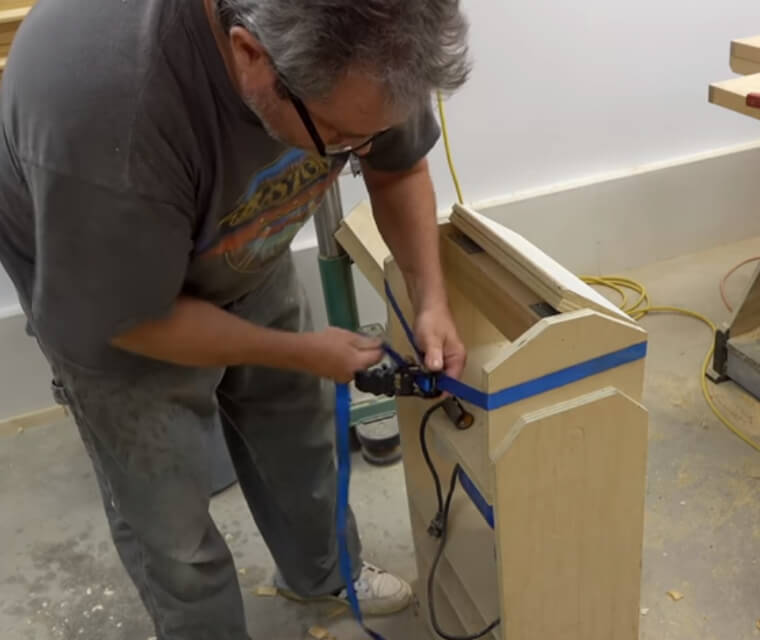
Use Tie-Down Straps for Clamping
Whether you're a DIY master or whether you're just looking to make a few home improvements, it's always a good idea to know how to clamp boxes. After all, these things can be both practical and aesthetically pleasing and can make a great addition to any home. But what happens if you don't have a clamping tool to keep the edges together when you're coupling the edges? Well, don't worry about that.
Instead of shelling out on an expensive clamping tool, you could utilize a ratchet tie-down strap instead. This should keep all of the pieces together until you're ready to secure them properly.
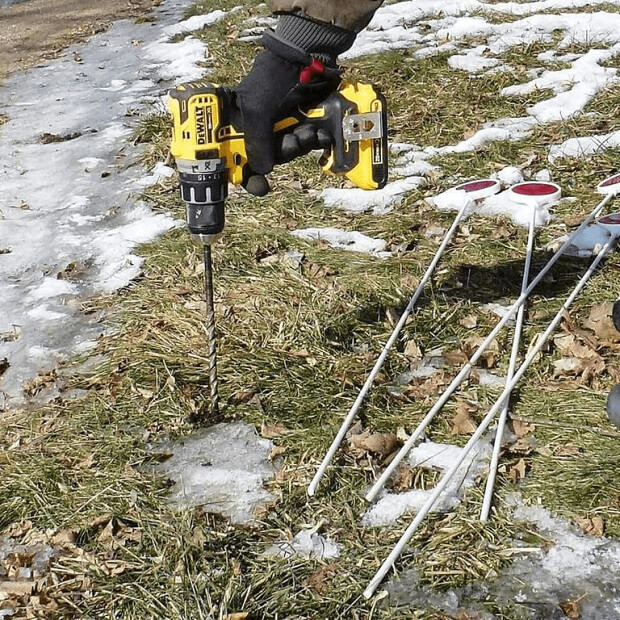
Use a Drill to Dig the Hard Ground
The winter months are a great time to do DIY projects inside the house, but sometimes you have no choice but to work outside, too. It can be extremely challenging to work in the winter months due to the weather conditions and the frozen nature of the ground. But if you're looking for a tool to help you dig into the hard ground when a shovel just won't cut it, why not use your drill instead?
This tool is designed to be able to drill through hard materials such as wood or brick, which means that it's perfect for drilling into hard or frozen ground during these months.
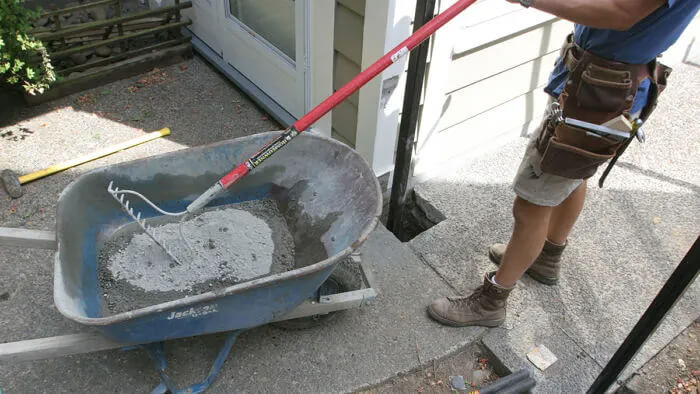
Use a Rake to Mix Concrete
Concrete is one of the most useful materials in the construction world, but there's no doubt that it's pretty difficult to rake. You need to make sure the consistency and water content is spot on, which is why most professionals use a shovel or a hoe to mix it properly. But if you don't have these extra tools at your disposal, you could head into your garden shed and whip out your rake instead!
Mixing concrete with a rake is super easy and one of the best ways to ensure that the concrete powder and the water are all mixed together. Before too long, you'll have the paste you're looking for.
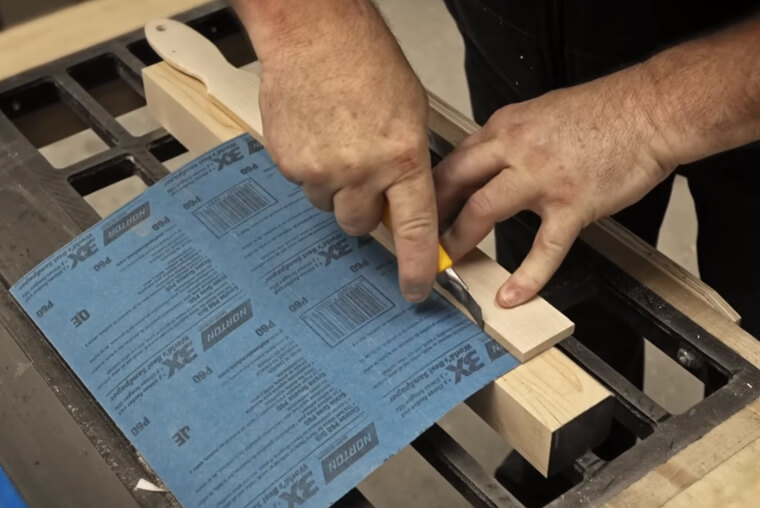
Use a Paint Stick to Make a Woodworking File
Although it doesn't look like other tools in a toolbox, sandpaper is one of the best things that any DIY lover could have in their arsenal. This stuff is great for buffing wood and finishing off projects, but have you ever been in a situation where you need to sand a hard-to-reach area? Well, one of the best ways to get into those nooks and crannies is to make your own DIY woodworking file.
To make this, stick some sandpaper around a paint stir stick. Then you need to hold onto the handle, slide it into these hard-to-reach areas, and sand it as you would any other area.
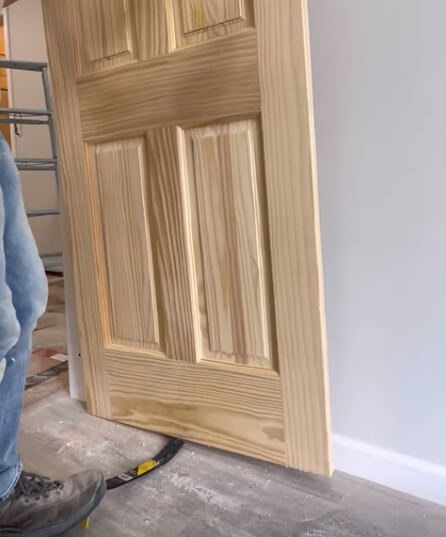
Use a Flat Pry Bar to Lift Doors
If you've ever tried to lift an internal door, you'll know they're much heavier than they look. Because of this, it's always a good idea to use tools to your advantage! And one of the best tools to use for this job is a flat pry bar. This tool is designed to remove nails and floorboards, but it can work wonders when you want to remove a door, as it fits perfectly underneath.
The design of the pry bar also means that you can put your foot on the end for extra force, and you can even put something underneath the bar if you need some extra help to remove it.
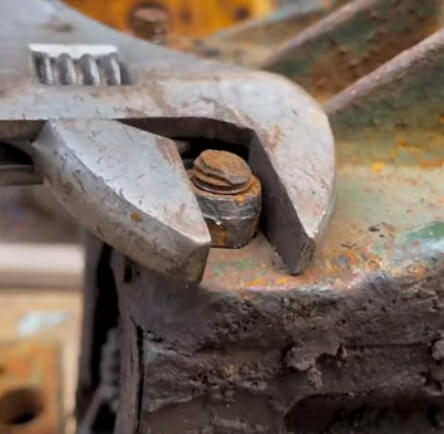
Use a Wrench for Stubborn Bolts
They say that a bad workman blames his tools, but that common phrase doesn't take into account the price of these tools! Sometimes you have to make do with what you have rather than shell out for brand-new and expensive tools, and a wrench is definitely one of the most versatile tools you could have in your toolbox. Especially if you're a newbie to the DIY world and find that you have to remove bolts quite often.
Although a spanner would be the perfect tool for this job, a pipe wrench can work just as well if you don't have one. With its impressive grip, you'll even be able to remove the most stubborn of bolts with ease.
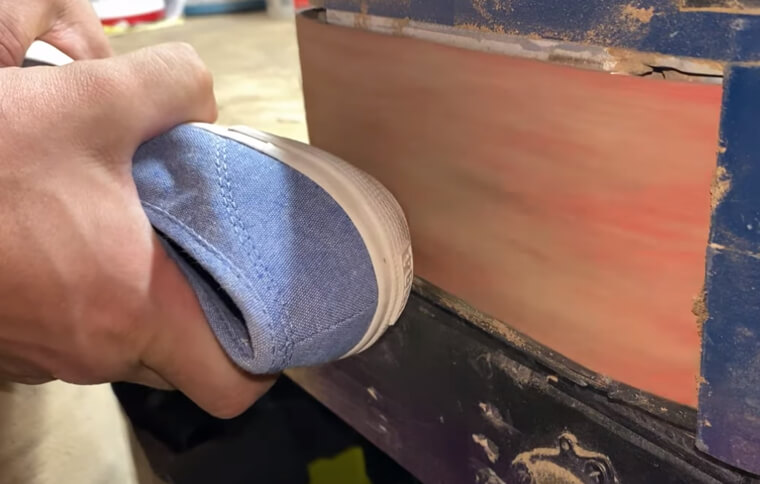
Use a Sneaker to Clean Your Sandpaper
It's easy to assume that your sneakers should stay on your feet and stay in their comfortable lane. But it turns out that these shoes can come in handy if you're looking for a way to clean your sandpaper after a long day of DIY. After all, there's nothing more annoying than going to start your project to realize that your sandpaper is dirty and worn. But a sneaker can help with that.
Instead of throwing away old sandpaper, give it a new lease of life by holding the rubber sole of a sneaker up against the sandpaper with the machine on. It'll be good as new in seconds.
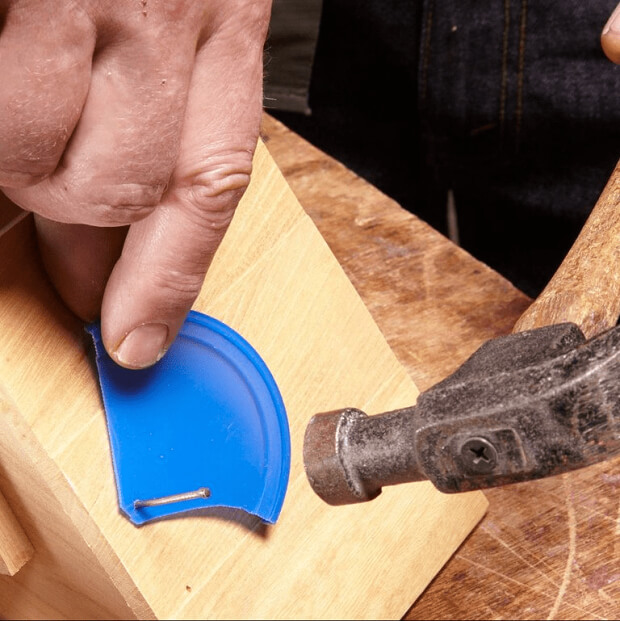
Use Plastic to Make Hammering Safer
A hammer is one of the most useful tools any DIY lover could have, but it's also one of the most dangerous. It's incredibly easy to miss a nail and hammer your finger instead, which is why it's always a good idea to put extra measures in place to keep yourself safe. And one of the best ways to do this is to use some old plastic you have lying around the house.
By fashioning your own little nail cover, you can still keep the nail in place without putting your fingers in danger. And when you're done, simply cut the plastic away.
Use a Large Roller to Make Smaller Rollers
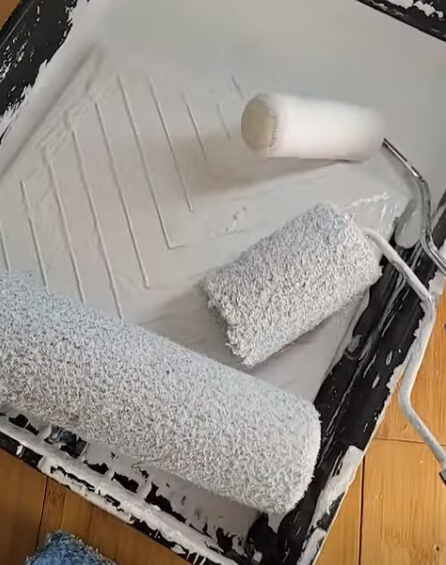
DIY comes in all shapes and sizes, and while some people love to get stuck in and build things from scratch, there are others who prefer to upgrade their homes with paint instead. And while paint rollers are great for getting even coverage on walls, sometimes these rollers are just way too big. But it's super easy to cut a larger roller into smaller ones for these smaller areas of a wall.
All you have to do is take your larger roller and cut it into smaller sections! Just make sure that you use a clamp when you're doing this, to maintain stability when you're cutting.
Use a Caulk Gun as a Clamp
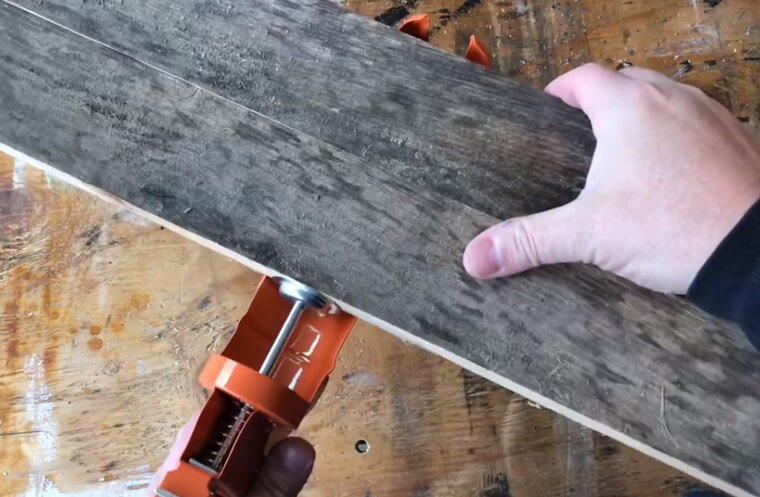
Although the idea of completing a DIY project can be exciting, the excitement can turn sour when you realize that you need to buy loads of new tools to complete the job. But instead of heading to the store and buying a clamp for one small job, why not utilize what you already have in your garage? If you have a caulk gun, you don't need to worry about buying a clamp at all, as it's the perfect substitute.
A caulk gun has its own in-built clamp system, but just remember to remove the caulk bottle before you start clamping. The last thing you want is caulk flying everywhere!
Use PVC Pipe to Make a Tool Holder
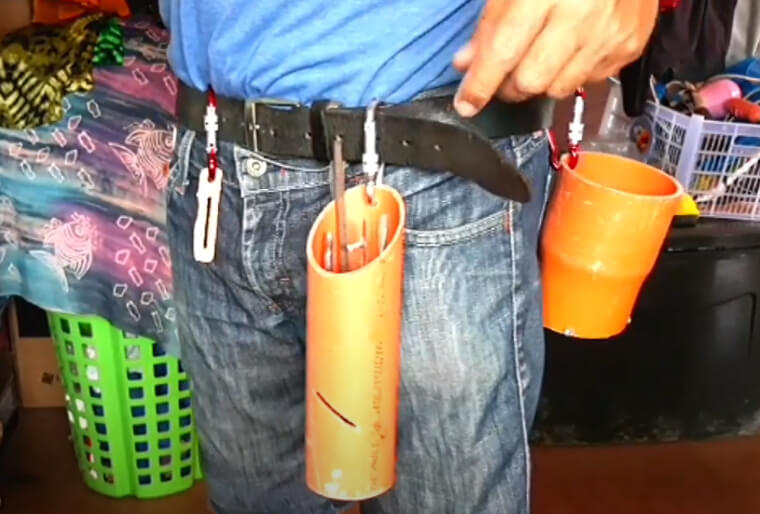
Whether you're a professional contractor or more of a hobby DIY-er, you're going to need lots of tools. But if you're used to using multiple tools at once, you'll know that it can be difficult to carry your toolbox around with you from room to room or carry them all in your hands. Thankfully, there is a way to solve that problem! And all you need is a PVC pipe.
By cutting this pipe down one side and attaching it to your belt loop, you can instantly create a tool holder that doesn't require any hands at all. Plus, the tools are easily removable.
Use an LED Light on Your Screwdriver
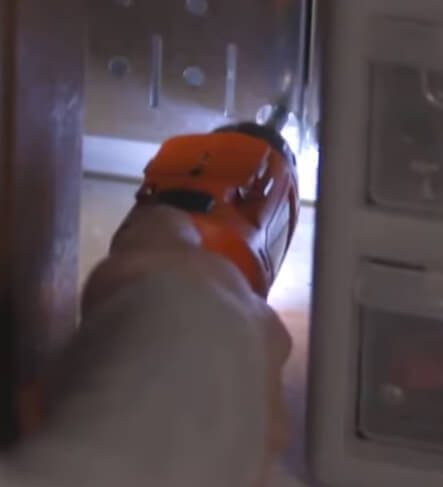
Screwdrivers are normally used for fiddly little screws - often in small spaces. And while this tool is extremely efficient at doing what it needs to do, it can be problematic when you can't exactly see what you're doing. Yes, no matter whether you're working in a cupboard or undoing the screw on an outlet behind the television, shining a light on the matter can make things much easier. An LED light, to be exact!
By attaching a small LED light to your screwdriver (with some tape), you can see what you're doing without rendering the small screwdriver useless. Just make sure you attach it quite far down the shaft so it doesn't get in the way.
Use Wood to Make a Hammer Rack
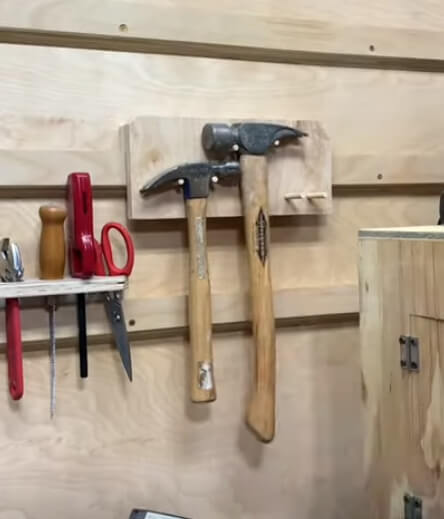
Although toolboxes are a great way for contractors and construction workers to take their tools from place to place, home DIY lovers keep all of their tools in one place instead. However, it's easy for tools in a garage to become disorganized and messy - which is why it's always a good idea to find nifty storage solutions for your tools. And if you're looking for a way to organize your hammers, look no further.
You can easily make a hammer rack by attaching a long piece of wood along the side of your garage. Then, simply affix nails or pegs into the wood, and hang your hammers from them.
Use Extra Leverage to Pull Nails
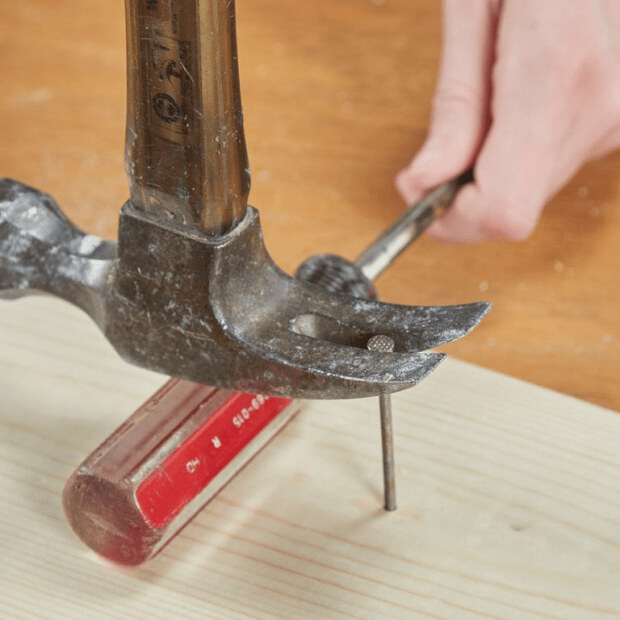
No matter whether you've made a mistake or whether you're pulling up some old and crumbling floorboards, you're probably going to have to pull nails up at some point in your DIY career. But depending on the position and the angle of the nail, this can be pretty difficult. It doesn't have to be, though. Most of the time a hammer just needs a little extra leverage, which is where a screwdriver can come into play.
By placing a screwdriver underneath your hammer, you have extra leverage to pull up the nail and remove it in seconds. It really does make a difference, and can save you a lot of time.
Use Rubber Chair Covers for Your Hammer
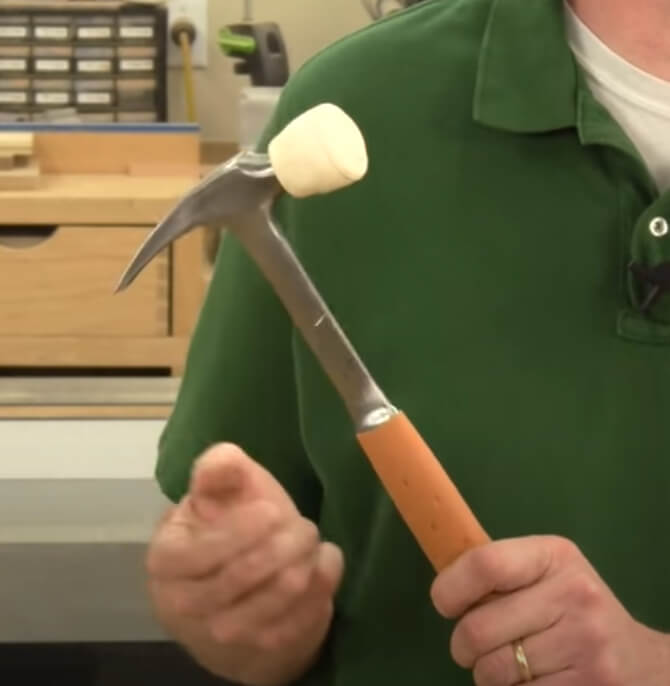
A hammer is one of those tools that everyone needs in their toolbox. One side can be used to remove nails and lift up floorboards, while the other side can be used to hammer nails into the surface of your choice. However, anyone who has used a hammer before will know that the strength of just one hit of the hammer can leave marks on a surface. So, use rubber chair covers to help you!
By placing these rubber chair covers over the head of your hammer, you can maintain the strength and integrity of the hammer without leaving permanent marks on a surface in the process.
Use a Vise-Grip Plier to Pull Nails
Most people have a hammer hanging around the house. It's one of the most common tools in people's toolboxes, but there might be a time when you find yourself without a hammer. Perhaps you lent it to a contractor friend, or maybe you've just misplaced it. But whatever you've done, you don't need to worry about how you're going to pull nails. After all, a vise-grip plier can work just as well.
The grip of this plier allows you to really grab the nail and pull it out, but if you need a little extra help you could use a wallpaper scraper to help you, too.
Use Plywood to Check Your Square
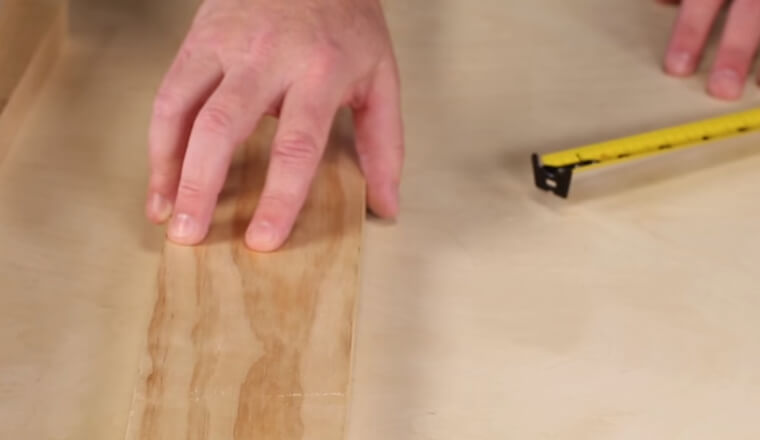
There are so many tools out there that claim to help you measure out perfect shapes and lines. But when it comes down to it, these tools often leave room for human error. So, if you're looking to draw a perfect square, you might want to go back to the drawing board and find something else to help you out. And that something definitely should be a piece of factory-processed plywood!
This plywood should have a perfectly straight edge, so you can use that to draw the shorter side of your square shape. Then, mark a line down the long side, and flip the whole thing. If your lines match, you have a perfect square!
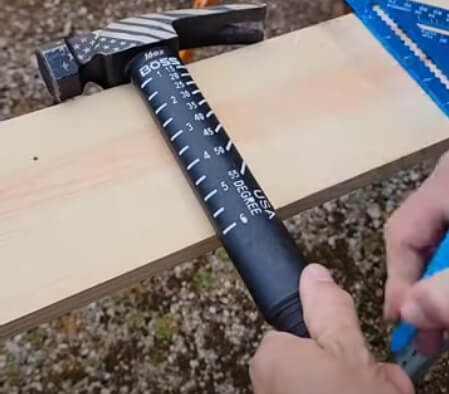
Use a Hammer to Measure Things
A measuring tape is one of the most important tools you can have in your toolbox. After all, every single DIY job you complete will probably need to be measured at some point or another. But as a measuring tape is so small, it can easily be misplaced - and this can be a nightmare when you desperately need it. Thankfully, though, there is another tool you can use when you can't find your measuring tape.
By using a hammer as your measuring marker, you can measure anything you need. All you need to do is make a note of the length of your hammer beforehand.
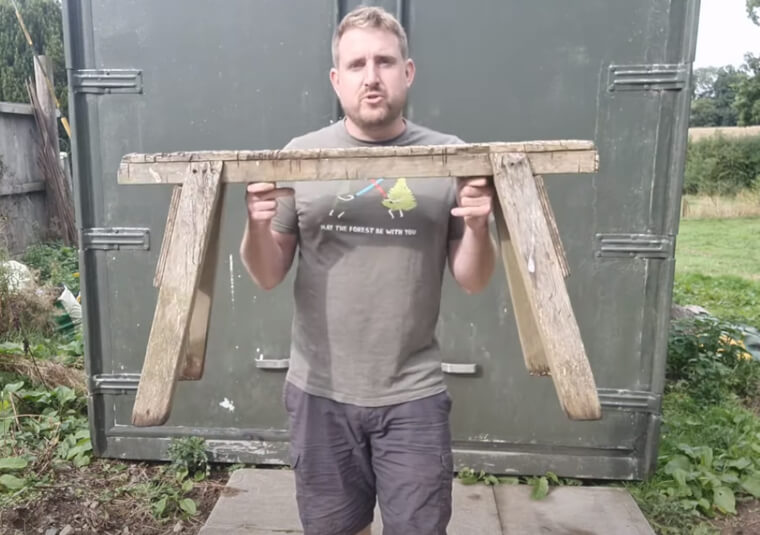
Use Carpet to Cover Your Saw Horse
A saw horse bench is a great tool for people who do a lot of cutting and sawing. It provides a great base structure to support whatever you are sawing, but as these things are made from wood, they can cause a few problems every now and then. Sometimes, the tough wood on the saw horse can cause damage to the thing you're sawing, which is not what DIY lovers want at all.
To combat this, simply cover your saw horse with some kind of soft material! Excess carpet works perfectly for this, and you can attach the carpet using a staple gun.
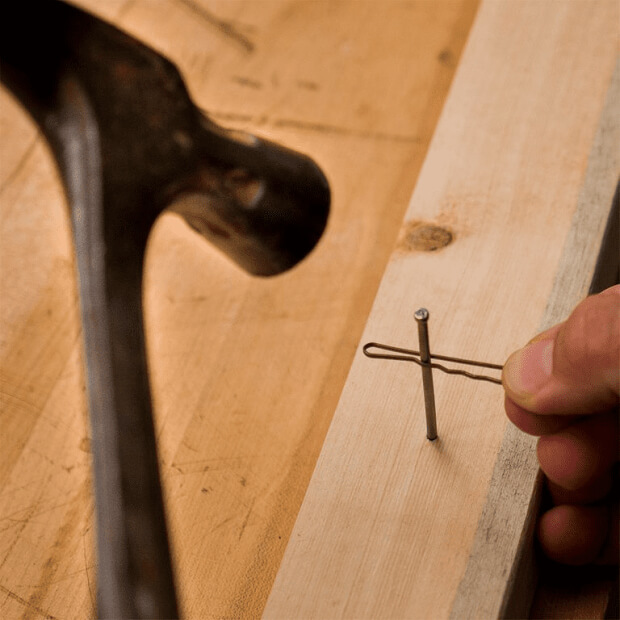
Use a Bobby Pin to Protect Your Fingers
Hitting your finger or thumb with a hammer is a concept most people are used to. Cartoons love bringing this workplace incident to life, and DIY lovers may have even suffered the pain themselves. So, if you want to avoid it ever happening again, you might want to try out this nifty little hammer trick. All you need to do is place a bobby pin around the thing you're looking to hammer.
The pin will keep the nail in place, meaning that you don't have to use your fingers as a barrier. Then, you can hammer as normal without bruising yourself in the process.
Use a Hammer to Split Wood
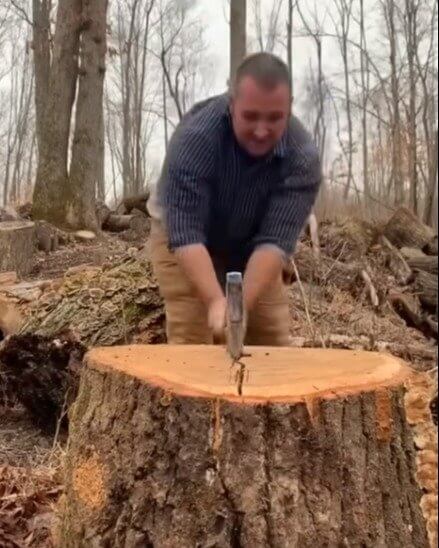
Whether you need to chop wood for the fire in your house or for a DIY project, it's no secret that most people use an axe to split their wood. But some novices won't have this tool in their toolbox, which is why we're happy to tell you that there's a more common tool that can work just as well. In fact, those who don't have an axe could use a hammer to split their wood!
Of course, you need to use the claw part of the hammer to do this rather than the head. And when you've done it once, you'll wonder why you've never done it before.
Use Hooks to Store Your Drills
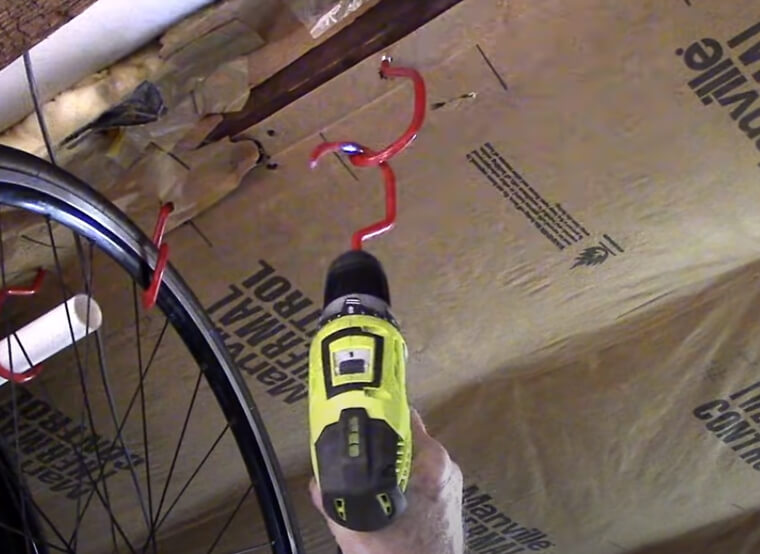
Although you can use screwdrivers when you need a handy tool, there's nothing quite like the power and the speed of a drill. These things are perfect for when you have big projects that require a lot of screws, so it's important to have them on hand at all times. But if you're someone who misplaces your tools quite often, it might be an idea to give them a designated storage space in your garage or shed.
A great way to store your drills is to hang them from large vinyl-clad hooks. You can drill these into a wall or onto some wood and give your drills a permanent home.
Use Wood Blocks to Make a Custom Vise
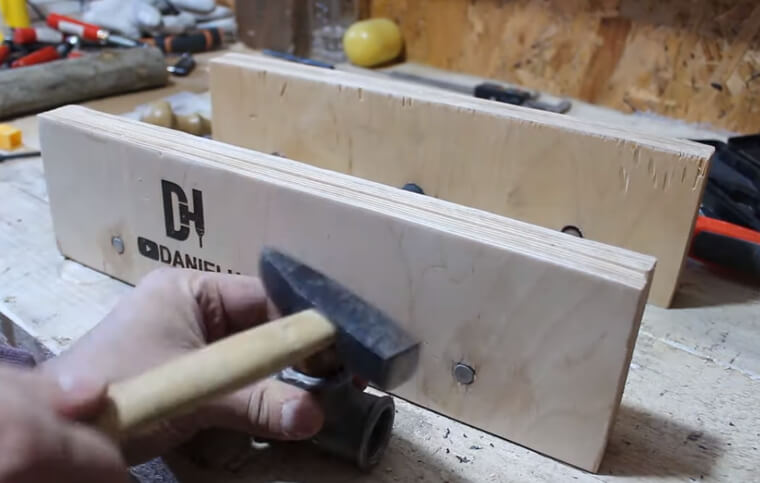
If you're someone who loves to get involved in woodworking and carpentry, you're going to need to add a vise to your tool collection. A mechanic vise is great for keeping things safe and secure while you're working on them - but only if you're working on larger items. So, if you're looking to use a vise for smaller items, you might have to make custom vise blocks. Luckily, it's not hard!
All you need to do is cut small blocks of wood and stick them onto either side of the vise. By doing this, you can lessen the gap between them and safely work on smaller items.
Use Tape to Make a Flush Hacksaw
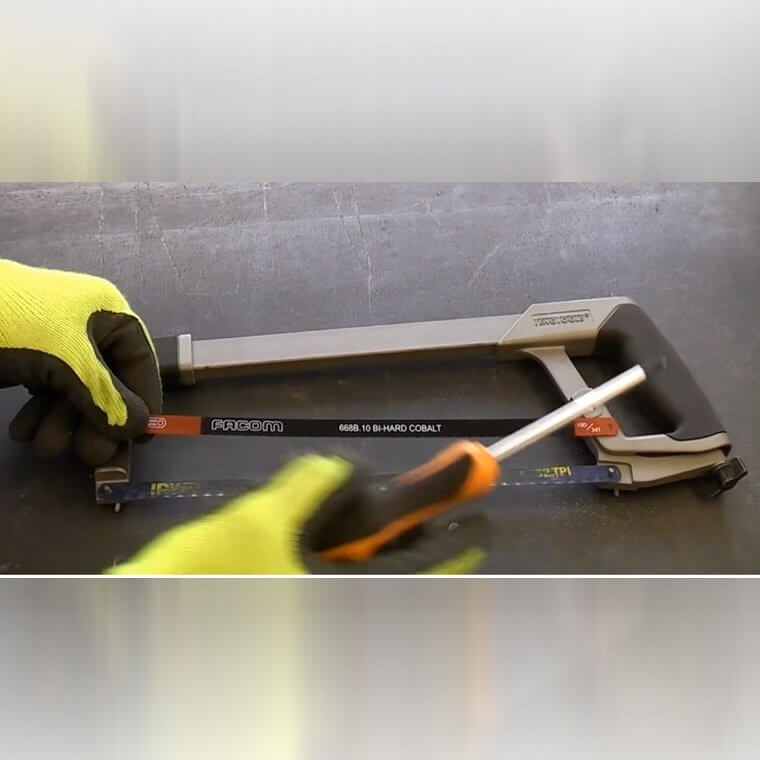
One tool that everyone should have in their toolbox is a hacksaw. This hand-powered tool is great for those who want to trim metal, cables, and wood - and it's even a good option when you want to cut something flush to the surface. However, you'll need to make a few adjustments to your saw if you intend to do this, as hacksaws can sometimes damage the surface of the material you're cutting.
To stop the teeth from marking or cutting something you don't want to cut, cover the blade with tape. Just make sure to leave the blade bare where you do want to cut.
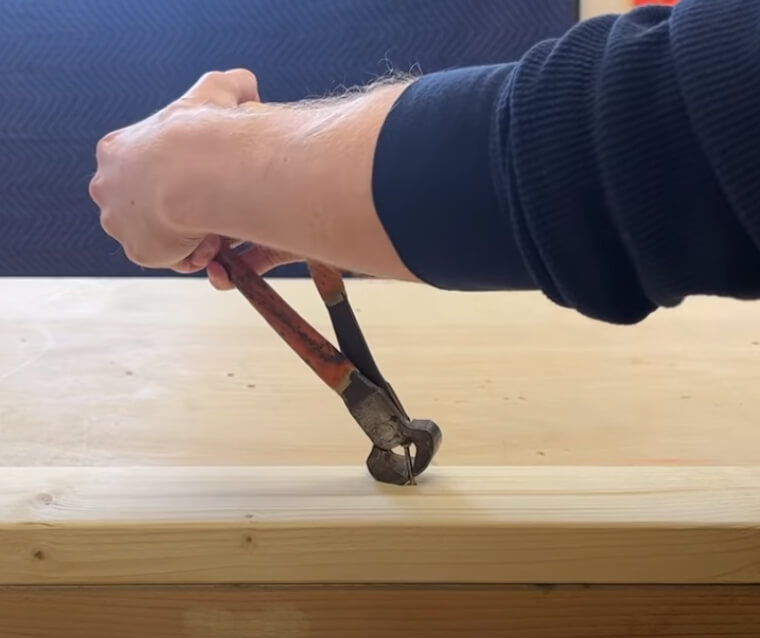
Use Locking Pliers and a Crowbar for Broken Nails
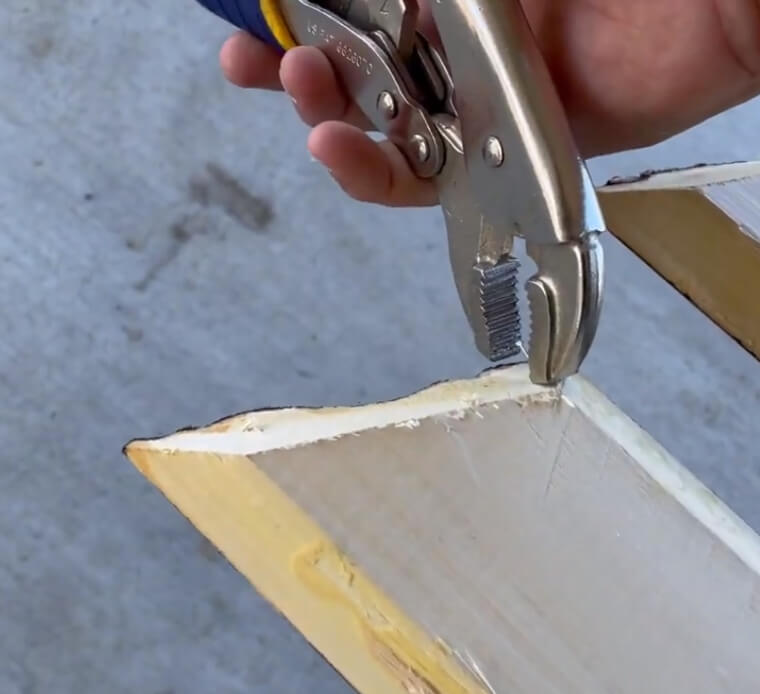
Women will say that there is nothing more annoying than breaking a nail - but DIY lovers would definitely say that, too! Although hammers can often remove nails quite well, sometimes stubborn nails do break in the process, which leaves you with limited solutions. But one of the best ways to remove this stubborn nail once and for all is to utilize the power of a locking plier and a crowbar.
By attaching the locking pliers to the top of the nail, you can create a temporary nail head. Then, go in with the crowbar to yank it out once and for all.
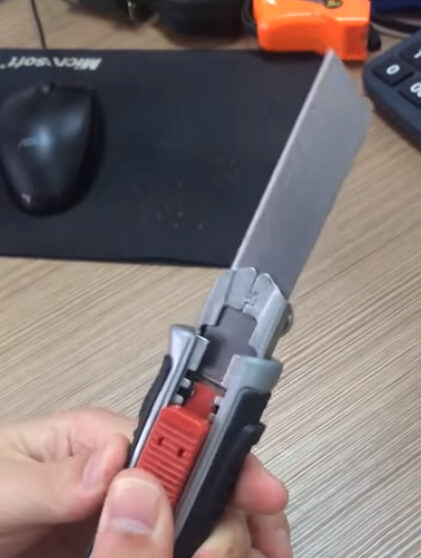
Use the Cartridge to Upgrade Your Utility Blade
Utility blades are great additions to any DIY lover's toolbox. They're not only great for opening up deliveries that come in the mail, but they're also great for cutting carpets, measuring construction projects, and so much more. And while these blades are designed to be long-lasting, constant use can make the blades blunt and less efficient as time goes on. But there is an extremely easy way to fix this, though.
Instead of ditching the blade altogether, make use of the cartridges that already come with the blade. All you have to do is break off the worn-out part and replace it with another in the cartridge.
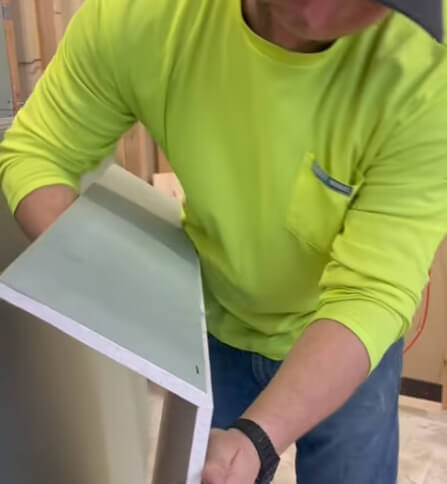
Use Wood to Make a Mini Drywall Blade
Whether you're building an interior wall yourself or just looking to make some adjustments to what is already there, a drywall blade will become your best friend. But these saws are normally pretty large, which can be an issue when you want to make smaller cuts. Don't worry about searching high and low for a smaller drywall blade, though. You can actually make one of these yourself from the comfort of your own garage!
By attaching a jigsaw blade to a wooden handle, you can create your own mini drywall blade that will work just as well as one you could buy from a hardware store.
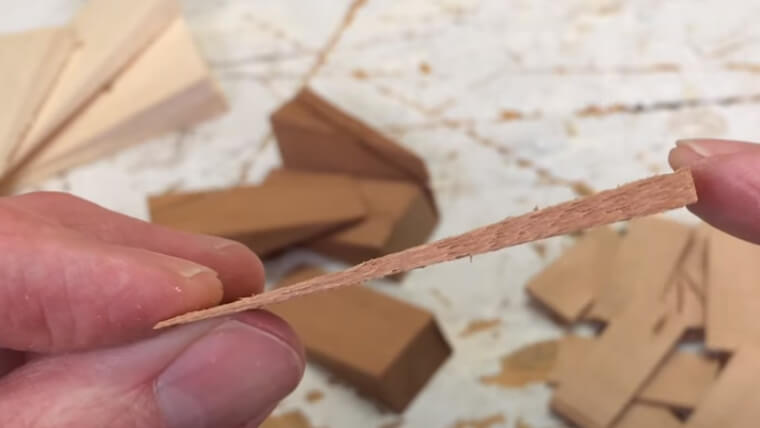
Use a Wood Shim to Protect Your Surface
Although hammers are incredibly practical and efficient tools, they are also quite hard to control. The user simply swings the hammer and hopes that it hits the middle of the nail. However, sometimes it doesn't and can bend the nail while also causing damage to the surface you're hitting. To stop this from happening and ruining your DIY project, why not use a wood and a wood shim to protect your surface instead?
This way, the wood shim will take the brunt of the hit rather than the surface you want to keep clean. Just remember to make a laceration to the edge of the wood so you can remove the nail.
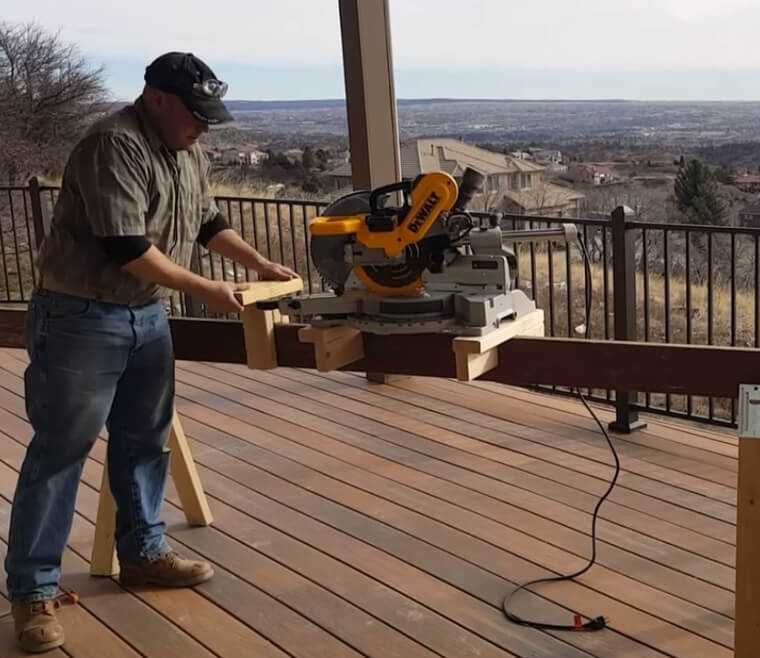
Use a Miter Saw Stand for Effortless Planing
Although most hobby DIY-ers could get involved in planing longboards, this is normally reserved for professional contractors and woodworkers. But if you do decide to stretch your DIY fingers and give this a go, you might want to give this nifty hack a go. That's because this can make planing so much easier, without having to constantly check the infeed and the outfeed during this very complicated and time-consuming process.
By laying your wooden board on a miter saw stand, you can let the miter saw stand do the hard work for you. After all, the board itself will do the infeed and the outfeed for you.
Use Pliers to Make a Hands-Free Light
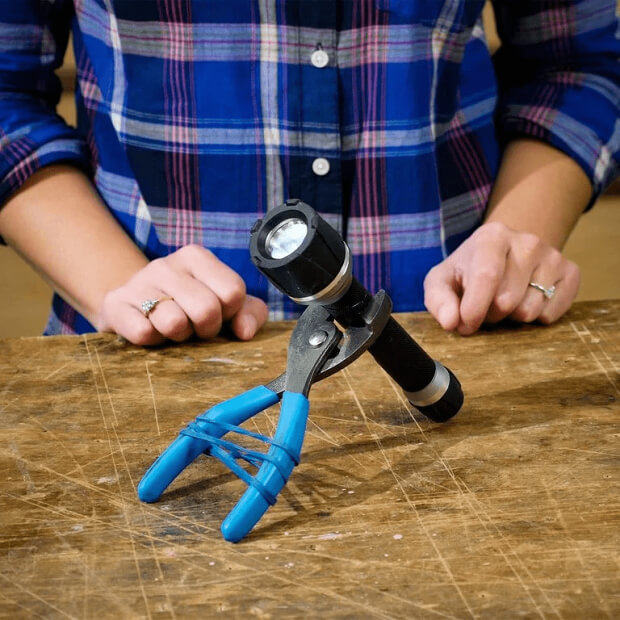
One of the greatest tools you could have in a toolbox is a torch! This thing will come in handy all the time and sometimes when you least expect it. But the one disadvantage of a torch is that you need to sacrifice one hand to hold onto it at all times. At least, that was the case before you learned this awesome DIY hack, as hands-free torches now exist.
Create a hands-free torch by sliding the torch into the mouth of a pair of pliers. Then, hold the handles in place using rubber bands, and lean the whole thing on the surface of your choice.
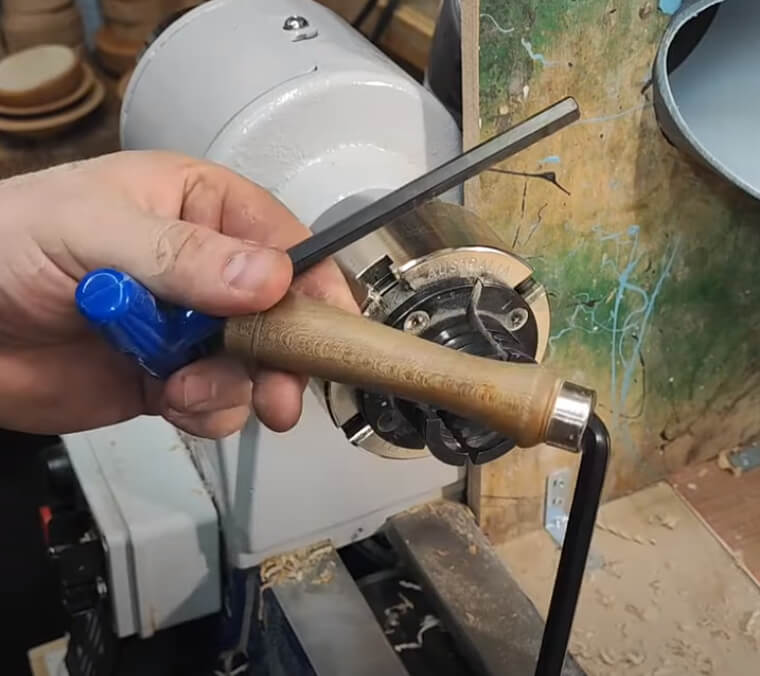
Use Wood to Make a Longer Chuck Key
People who do DIY as a hobby probably don't use a chuck key, but contractors and professionals who use machinery on a regular basis will definitely use this tool. It's used to tighten and loosen gear systems in machinery, and while they do the job, they're often incredibly hard to use. That's because their handles are often incredibly small and fiddly. But what if we told you that they don't have to be?
It's super easy to use some wood to make your chuck key longer, as you just need to make sure that the original key fits snuggly into a hole you drill into the wood.
Use Your Strength to Keep Your Can Opener Safe
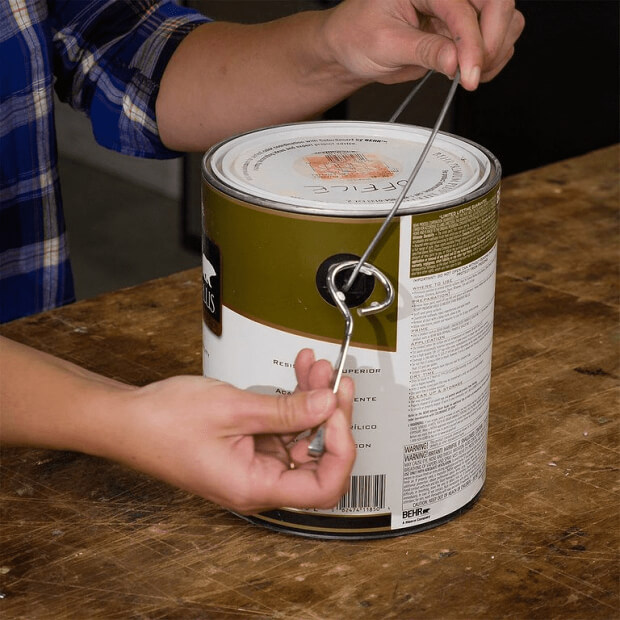
Although we're thankful for the strong nature of a paint pot lid, this can be annoying when you're trying to open it. And while some people have their own ways to open a pot of paint, a can opener will always come in handy. This tool has literally been designed for this purpose, so why wouldn't you use it? Well, some people don't use it because this small tool is very easy to lose!
Don't worry about ever losing this opener again, though. Either use brute force or another tool to make a slight opening in the loop of the can opener, and simply hook it onto your paint pot.
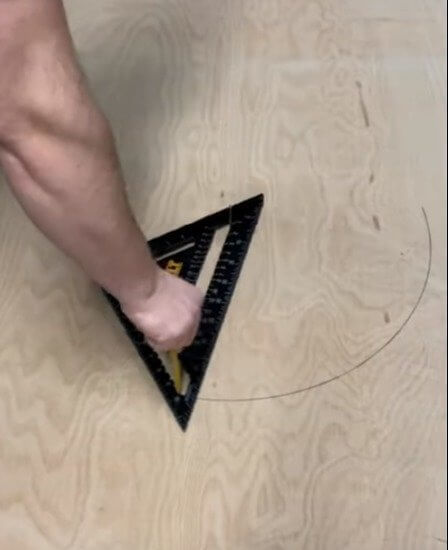
Use a Square to Draw a Circle
In the DIY world, circles are notoriously difficult to perfect. Although it's easy to find tools that can help you perfect straight lines or shapes with straight lines in them, it's hard to find tools that can help you perfect a circle. But in a strange turn of events that doesn't seem to make sense, you can actually use a square tool to draw a circle if you want to!
Simply mark your diameter points and place nails on either side of this diameter, place a pencil in the corner of the square, and then rotate it around the nails.
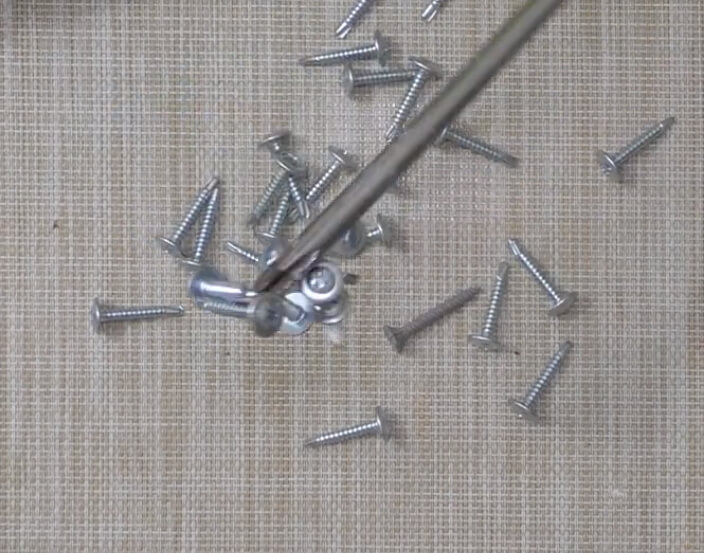
Use a Magnet to Keep Screws in Place
Anyone who does DIY will know that trying to keep small screws in place while attempting to screw it in is sometimes impossible. The screw always seems to fall out of place, and you're constantly battling with the small size. But there is a way to avoid this entirely! In fact, one of the best ways to keep your screws in place is to use a magnet, and you can even magnetize your screwdriver.
To magnetize your screwdriver, all you need to do is hold a magnet against it for about five minutes. After that, it should be able to pick up and hold onto screws with ease.
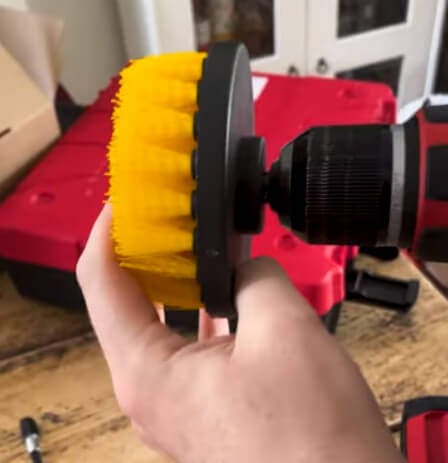
Use a Drill to Make a Cleaning Brush
Although DIY projects can be messy, it's important to always take time to not only clean up the things you make but also to clean the area you've made it in. And while you could spend hours on your hands and knees brushing the floor clean, you could save so much time by using a handy tool in your toolbox to your advantage. Yes, all you need is a drill!
Simply take a brush head and attach it to the head of a drill bit, and turn the drill on. By doing this, you'll be done in no time at all.
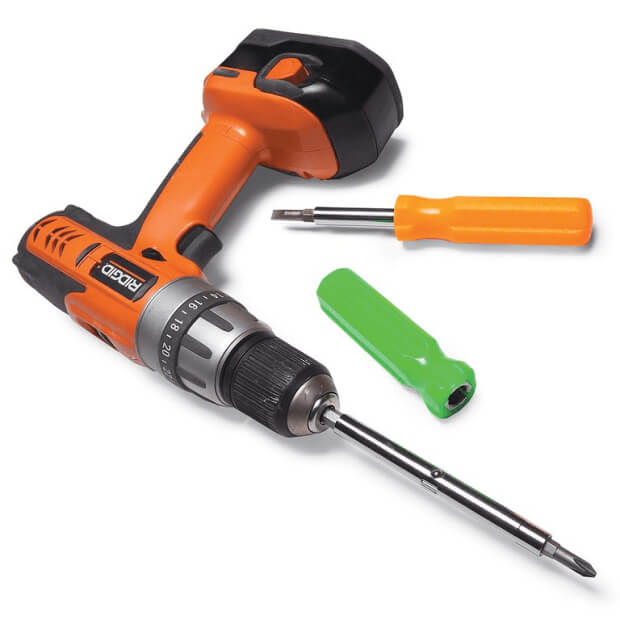
Use a Screwdriver to Lengthen Your Drill
A trip to any hardware store will show you that there are so many drills and drill bits out there, but having all shapes and sizes in your toolbox will set you back a hefty fortune. Thankfully, there are alternative options if you find that your drill bit isn't long enough to reach where you need it to reach. And if you need to lengthen your drill, you can grab your screwdriver instead.
All you have to do is remove the drill's original drill bit and replace it with the shaft of a longer multi-bit screwdriver that you already have in your toolbox.
Use Kitty Litter to Protect Your Tools
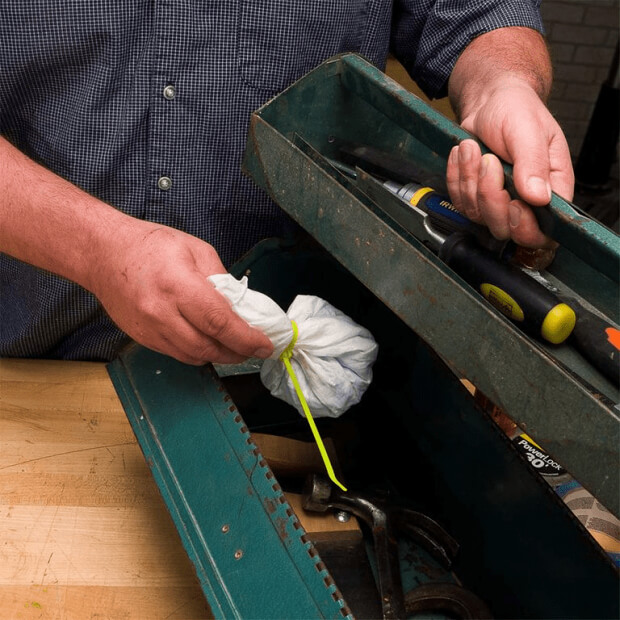
Most toolboxes around the world are filled with tools that are made from metals. And while this ensures that they are extremely strong, this also means that they are susceptible to the elements. It's very easy for metal tools to become rusty, and this can seriously impact their practicality. But if you have some spare kitty litter lying around, you can stop this rust in its tracks and keep your tools as good as new.
By putting a pouch of kitty litter in your toolbox, you can let it soak up any moisture in the air before it affects your tools. Just make sure that the litter has silica crystals in it.
Use a Creeper to Transport Tools
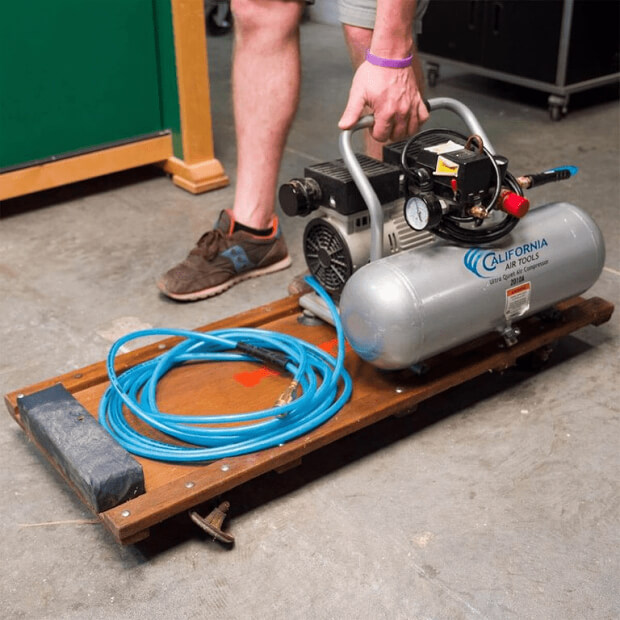
If you're someone who loves to spend their free time tinkering in the garage, fixing a car, or building new furniture for your house, you're probably going to have a lot of tools. But some tools in this world are extremely heavy, and take a huge toll on your back if you're constantly carrying them from one side of the garage to the other. So, why not make use of your mechanic's creeper?
This creepier is designed to slide effortlessly along the floor, so you can simply slide your tools to where they need to be rather than carry them. It really is that simple.
Use a Hammer to Fix Your Square
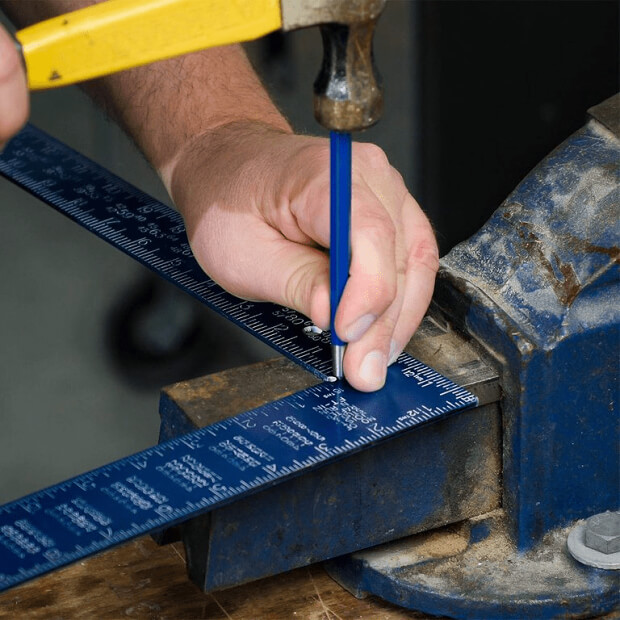
If you take a trip to Home Depot, you'll see that there are so many tools out there. But if you're someone who likes to create an accurate square shape or 90-degree angle, a square could really come in handy. And while these tools are designed to be as perfect as possible, sometimes there are discrepancies that could affect your DIY project. Thankfully, there is a way to fix this if you find that your square is not quite right.
If your square is too wide, you can hammer a center punch into the outer corner. Alternatively, hammer the center punch into the inner corner if the square is too small.
Use Different Sized Nails in Your Nail Gun
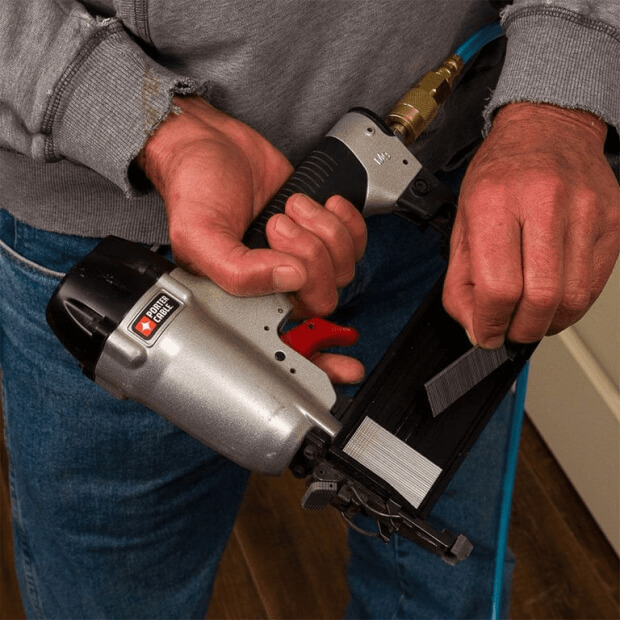
If you want to ensure that you're ready for any DIY eventuality, you're going to want to fill up your toolbox with all of the best tools in the business. This includes things like drills, hammers, wrenches, tool belts, and more. In fact, it's also a good idea to have a nail gun on hand. But to save time, why not put two different-sized nails in your nail gun at the same time?
By putting these two sizes in the magazine, you can be ready for any eventuality without having to go to the store and buying a different size. Plus, you can swap them out whenever you want.

